Asteroids with FRB
part 1
Preface
I thought I would share everything I've learned over the past few months in using FlatRedBall. I thought I would take the asteroids tutor further, and turn it into a full game.
I would take you with me, every step of the way, and hope I don't lose you. I'm going to start it over, and do it my way. Though I"m sure you will notice lots of similarities.
I assume you have a good understanding of XNA and C# already. This is just to get you started and on your way with the FRB game engine. This tutor is designed as your first game as well, I will show you how to spawn enemies, how to make something shoot at something else. How to keep track of multiple objects. By the end it will be a decent clone with high score, and attract, game over, and player died screens. I also want you to think ahead on what you will need to compleate a game.
Introduction
I'm sure you all know the great and classic game of Asteroids from 1979. It is a very simple game by todays standards.
Through the making of it we will show you how to:
Through the making of it we will show you how to:
- Use input (both Xbox controller and keyboard)
- Entity Management. (Player ship, asteroids, and UFO)
- Simple physics and geometry.
- Runtime Entity creation (bullets).
- Simple Screen management.
- Simple score system.
- Simple collision detection.
Prepare
You will need FRB installed as that is the point of this tutor. I assume you already have it installed. If you need it you can download it from the FlatRedBall downloads page.
I'll be using these two class templates, place them in your \Users\[user name]\Documents\Visual Studio 2008\Templates\ItemTemplates\Visual C#\XNA Game Studio 3.1\ folder.
The blank FRB class template and screen template will be used in the tutor. Create a new project using the 'NewProjectCreator' program, name the project 'Asteroids'. Or you can download the Step One project to help you get started. It has it all setup, as far as step one done for you.
Chapter One
Step One
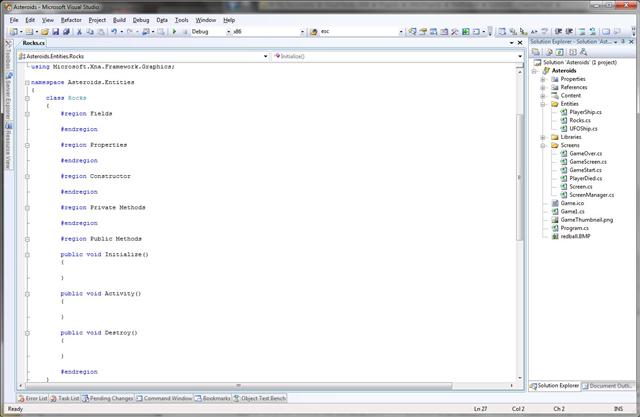
I like to plan out the game ahead of time. For Asteroids we already know how its going to end. We just need to figure out the parts we need to get there. First I like to create all the classes ahead of time. One should have it all planed out so over time this will become natural for you. We will be using a class for the player ship, one for the rocks, and one for the UFO ship. You should have a folder called Entities in the main project folder, if not make one. Under that add PlayerShip.cs, Rocks.cs, and UFOShip.cs using the blank FRB class template I had you download. Everything that has to do with the player will be kept in that class, including functions. Anything that has to do with asteroids will be kept in its own Rocks class, and same with the UFO ships. Keep it separated! Don't do what I did at first and heap everything into one class, and just have little things in there own classes. What a mess that was, I'll tell you what. That was what I learned not to do in the other tutor I did some time ago, you can see it on the main page of my web site.
Next create four screen classes, there names pretty much tell you what they are for. Under the screens folder add GameScreen.cs, PlayerDied.cs, GameOver.cs and GameStart.cs.
The reason for this is each part of the game should be under its own screen. I only put the code in the screen that needs to be there, such as collision detection and what to do about it. We will be learning very modular code, so most of that will be pointing to functions inside the separate classes, depending on what is hitting what. Each class will keep track of only its own thing. We will be using interfaces for everything. This will help you keep track of things, and keep bugs on the down low, easy to keep track of.
The last part is to add this line in the Game1.cs class in the Initialize function add this line after all the commented out lines.
Screens.ScreenManager.Start(typeof(Asteroids.Screens.GameStart).FullName) |
Make sure to delete this line:
SpriteManager.AddSprite("redball.bmp"); |
To learn more about screens, you can read up on them here. They help you clean up after yourself, and keep you organized as you will see more about later.
In the three entity classes, add these blank public functions inside the Public Methods region:
In the three entity classes, add these blank public functions inside the Public Methods region:
public void Initialize()
{

}

public void Activity()
{

}

public void Destroy()
{

} |
They are used in all of them. Initialize we will call in the GameScreen Initialize Function, so it only runs once when the game starts. The Activity function we call in the GameScreen Activity function, so it is called on every frame. The Destroy function we call in the GameScreen Destroy function so that all our managed objects are destroyed, we must clean up after ourselves. I think it is better to clean up yourself, rather then rely on automatic cleanup. This teaches cleaner programing, at least I believe it does.
If instead you would like to download the project up to this point you can get here: FRB Asteroids tutor Project step one. Unzip it to where you want to keep your project files.
If instead you would like to download the project up to this point you can get here: FRB Asteroids tutor Project step one. Unzip it to where you want to keep your project files.
Step Two
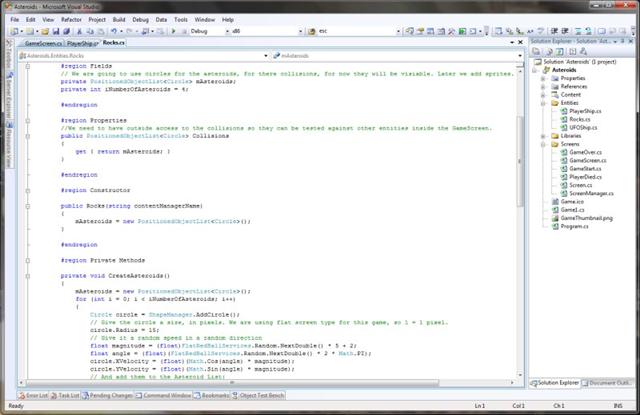
The first thing I'll have you do is get the Rocks.cs class started. By the end of this chapter, you will see rocks floating around your screen. Woot. Now with the Asteroids.cs open:
Add this to the Fields region:
Add this to the Fields region:
// We are going to use circles for the asteroids, for there collisions, // for now they will be visiable. Later we add sprites. private PositionedObjectList<Circle> mAsteroids; private int iNumberOfAsteroids = 4; |
Add this to the Properties region:
// We need to have outside access to the collisions so they can be tested
// against other entities inside the GameScreen.
public PositionedObjectList<Circle> Collisions
{
    get { return mAsteroids; }
} |
Add this to the Constructor Region:
public Rocks(string contentManagerName)
{
    mAsteroids = new PositionedObjectList<Circle>();
} |
Add this to the Private Methods region:
private void CreateAsteroids()
{
    mAsteroids = new PositionedObjectList<Circle>();
    for (int i = 0; i < iNumberOfAsteroids; i++)
    {
        Circle circle = ShapeManager.AddCircle();
        // Give the circle a size, in pixels. We are using flat screen type
        // for this game, so 1 = 1 pixel.
        circle.Radius = 15;
        // Give it a random speed in a random direction
        float magnitude = (float)FlatRedBallServices.Random.NextDouble() * 5 + 2;
        float angle = (float)(FlatRedBallServices.Random.NextDouble() * 2 * Math.PI);
        circle.XVelocity = (float)(Math.Cos(angle) * magnitude);
        circle.YVelocity = (float)(Math.Sin(angle) * magnitude);
        // And add them to the Asteroid List:
        mAsteroids.Add(circle);
    }
} |
Add this inside the Public Destroy method:
// We are going to destroy the objects ourselves, this will help you keep in
// mind what you need to do yourself in the manager.
// If everything is done for you automaticly, then you may stop thinking about
// cleanup if you need to do it yourself.
while (mAsteroids.Count > 0)
mAsteroids.Last.RemoveSelfFromListsBelongingTo(); |
We first need to initialize the PositionedObjectList (Read up on that here) of a type Circle (Read up on that here) and the integer for the private method to use later.
We make a property for that list of circles we will use for collisions, that is your interface for outside access from other classes. This will be used in the GameScreen class for collision detection later. All the entities classes will have such a property in them. That way we can run test on them in that other class that has access to them all.
Now for the private method, now this will be called more then once so we make it self contained. It uses a for loop to add circles to that list we created earlier. This is where the game engine gets really sweet. First it creates a circle in a Shapemanager that only exists inside that for loop. All the information for that circle is put into that list at the end.
Now sense this game is pure 2D, we are going to use a 2D camera, so it will be easier to keep track of things if we know pixels are 1 to 1. So if something is 30 wide, its 30 pixels wide. You will see in the next step how that is done in the Screen class.
Last but not least we need to have what we build inside the Destroy method, this removes all the rocks from that list, we must clean up after ourselves. This will get called in the GameScreen class I talked about before. We need that so when we switch to the Game Over screen or Player Died screen, we don't have circles (or sprites later) sitting around and cause issues, such as an exception error.
Step Three
Now it is time to work on the GameScreen.cs class. So open that for editing, we are first going to add fields to the class level. The new template does not have the fields region so I'll have that in there too.
On the top of the class, at class level add:
On the top of the class, at class level add:
#region Fields private Rocks RockSprites; #endregion |
Find the Initialize method (Open the Constructor and Initialize method region) and add:
// We have a content manager in here for when we will be adding spritse later.
RockSprites = new Rocks("Rocks");
// I decided to seperate this for easier reading. This will be called every
// new level as well later on.
RockSprites.Initialize();
SpriteManager.Camera.UsePixelCoordinates(false); |
Now last, but not least, add this line to the Destroy method:
RockCollosions.Destroy(); |
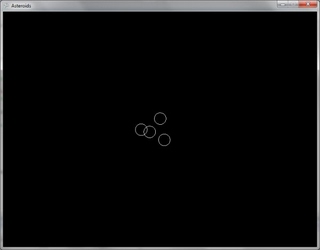
Now, click on run, you should see four circles (Our rock collisions) in the center of the screen, we will leave them visible until we are ready to add sprite textures. They should also be slowly drifting in different directions.
Now, what we did here was initialize the class, then created an instance passing the content manager name to the constructor for later use. The next line runs the Initialize method in that instance of the class known as RockSprites. Next is important for doing 2D games, the SpriteManager.Camera (Read about the Camera) line. This effectively flattens the z axes so that all scale and pixel sizes for sprites will be 1 to 1. If you are not going to be using the Z axes I suggest doing that.
Next we call that Destroy function if and when the screen were to change. As it is now, its never called, but it will be used later.
If you are having issues download FRB Asteroids Project step Three
Next we call that Destroy function if and when the screen were to change. As it is now, its never called, but it will be used later.
If you are having issues download FRB Asteroids Project step Three
