Asteroids with FRB
part 3
Get ready, this is going to be a long chapter. First we edit the Rocks class to add more functionality and remove the hard coded numbers. Hard coded numbers, bad. We also add a new private function for when we add the collision detection, to remove a rock when its hit. I show you how to easily put the rocks where we want them, not in the center.
Then we edit the GameScreen class because of the changes we make in the Rocks class. We do a test run.Next we edit the PlayerShip class, we add movement functionality. I hope you are excited kids! Only one file you can download at the end of this chapter, so pay attention!
Then we edit the GameScreen class again, because of the changes we make in the PlayerShip class. We do another test run!
Step One
Open the Rocks.cs class file, we are going to do some editing.
In the Fields region, remove the iNumberOfAsteroids line, and add these two:
In the Fields region, remove the iNumberOfAsteroids line, and add these two:
private int iRockSize = 25; private int iRockSpeed = 10; |
We move how many rocks we make to the function, with that there is no need to have a class scope variable anymore. We make a default rock size and speed variables instead, getting rid of those hard coded numbers. We will do more with that later, this will do for now.
Now for the next one I'm just going to show you the replacement method for CreateAsteroids:
Now for the next one I'm just going to show you the replacement method for CreateAsteroids:
private void CreateAsteroids(int MaxX, int MaxY, int RockSize, int RockSpeed, int NumberOfRocks)
{
    mAsteroids = new PositionedObjectList<Circle>();
    for (int i = 0; i < NumberOfRocks; i++)
    {
        Circle circle = ShapeManager.AddCircle();
        // Give the circle a size, in pixels. We are using flat screen type for this game, so 1 = 1 pixel.
        circle.Radius = RockSize;
        // We use the RockSize so they don't go off the edge to begin with.
        MaxX = MaxX - RockSize;
        MaxY = MaxY - RockSize;
        // Give it a location not at the center of the screen
        while (circle.X < (RockSize * 4) && circle.X > (-RockSize * 4))
            circle.X = (float)FlatRedBallServices.Random.NextDouble() * MaxX - (MaxX / 2);
        while (circle.Y < (RockSize * 4) && circle.Y > (-RockSize * 4))
            circle.Y = (float)FlatRedBallServices.Random.NextDouble() * MaxY - (MaxY / 2);
        // Give it a random speed in a random direction
        float magnitude = (float)FlatRedBallServices.Random.NextDouble() * iRockSpeed + 3;
        float angle = (float)(FlatRedBallServices.Random.NextDouble() * 2 * Math.PI);
        circle.XVelocity = (float)(Math.Cos(angle) * magnitude);
        circle.YVelocity = (float)(Math.Sin(angle) * magnitude);
        // And add them to the Asteroid List:
        mAsteroids.Add(circle);
    }
} |
As you can see, there have been quite a few changes. I made two while statements that make sure they are not spawned in the center, just like the real game. This is one reason why having 0,0 being the center makes things so much easier. You may also notice that a few integers are passed into the function, including rock size and speed as well as MaxX, and MaxY, and of course number of rocks. This makes the function much more versatile. We will need to size these later when we turn them into sprites, with textures.
Next Add a new private method:
Next Add a new private method:
public void AsteroidHit(int Rock)
{
    ShapeManager.Remove(mAsteroids[Rock]);
} |
This will be for when we are able to shoot the rocks, the collision detection happens in the GameScreen where the classes get together and play. So we need an interface to get rid of a rock. The Remove function of the shape manager gets rid of the rock number, Rock. We pass that in the function when its hit. Remember, the rocks are all in a list. After the rock is removed, say it was rock number 2, rock 3 becomes 2, and 4 becomes 3. That is done automatically.
Add this new private method as well:
Add this new private method as well:
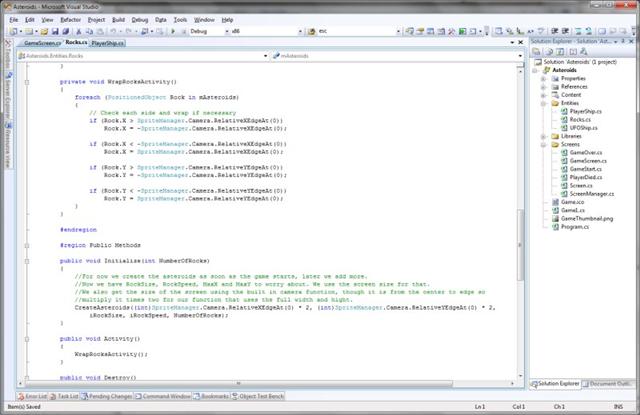
private void WrapRocksActivity()
{
    foreach (PositionedObject Rock in mAsteroids)
    {
        // Check each side and wrap if necessary
        if (Rock.X > SpriteManager.Camera.RelativeXEdgeAt(0))
            Rock.X = -SpriteManager.Camera.RelativeXEdgeAt(0);

        if (Rock.X < -SpriteManager.Camera.RelativeXEdgeAt(0))
            Rock.X = SpriteManager.Camera.RelativeXEdgeAt(0);

        if (Rock.Y > SpriteManager.Camera.RelativeYEdgeAt(0))
            Rock.Y = -SpriteManager.Camera.RelativeYEdgeAt(0);

        if (Rock.Y < -SpriteManager.Camera.RelativeYEdgeAt(0))
            Rock.Y = SpriteManager.Camera.RelativeYEdgeAt(0);
    }
} |
This will wrap our rocks onto the opposite edge nicely, using the same camera function we use again later. As you can see we use the foreach, this is easier then a for next loop sense we are going through a list.
Now we change the Initialize public method This is the new one:
Now we change the Initialize public method This is the new one:
public void Initialize(int NumberOfRocks)
{
    // For now we create the asteroids as soon as the game starts, later we
    // add more.
    // Now we have RockSize, RockSpeed, MaxX and MaxY to worry about. We use
    // the screen size for that.
    // We also get the size of the screen using the built in camera function,
    // though it is from the center to edge so
    // multiply it times two for our function that uses the full
    // width and height.
    CreateAsteroids((int)SpriteManager.Camera.RelativeXEdgeAt(0) * 2, (int)SpriteManager.Camera.RelativeYEdgeAt(0) * 2, iRockSize, iRockSpeed, NumberOfRocks);
} |
As you can see, I added the screen hight and width, and number of rocks. The later is then passed on to the createasteroids method that we changed earlier. This is our interface. Using the Camera Relative Edge At function built into the engine we get from the center to edge, now in our function I use the full width and hight, so I double it.
Add this line to the Activity public function:
Add this line to the Activity public function:
WrapRocksActivity(); |
This will call the wraprockactivity function, when its called, from the GameScreen class.
Alright, this is all the changes for now, for this class.
Step Two
Open up the GameScreen.cs class, we now get to work here to make our needed changes.
In the Fields region add this line:
In the Fields region add this line:
private int iNumberOfRocks = 4; |
This is our default for how many rocks the game starts with. We then can add more later as the game advances.
Change the RockSprites.Initialize method call to this:
Change the RockSprites.Initialize method call to this:
RockSprites.Initialize(iNumberOfRocks); |
This pases in our amount of rocks we want.
In the Activity public method add this line:
In the Activity public method add this line:
RockSprites.Activity(); |
This calls our activity method we added that other call to in step one.
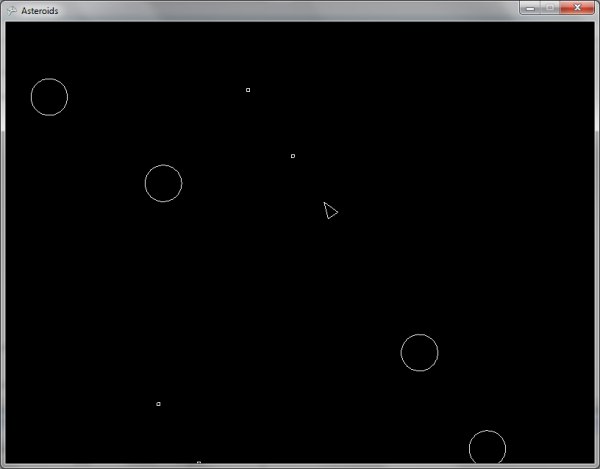
Now run, if you wait you should see rocks that appear on the opposite edges as the game runs, so that they wrap around the screen, just like the real game.
If you have any issues, you can download this chapters project at the end of this chapter, or go over it, and see if you can debug it yourself. That usually helps one to learn.
Step Three
Open up the PlayerShip.cs class file, this is where it gets really fun.
In the Fields region add this line:
In the Fields region add this line:
private PositionedObjectList<AxisAlignedRectangle> mBullets; |
This initializes the list that will hold our bullets.
In the Properties region add this:
In the Properties region add this:
public PositionedObjectList<AxisAlignedRectangle> Bullets
{
    get { return mBullets; }
} |
This is so we can access the bullet for collision detection. This is our interface.
Add this line to the Constructor:
Add this line to the Constructor:
mBullets = new PositionedObjectList<AxisAlignedRectangle>(); |
This makes an instance of that list, so we can use it.
Add these private methods:
Add these private methods:
private void GetKeyboard()
{
    if (InputManager.Keyboard.KeyPushed(Keys.RightShift))
    {
        if (mBullets.Count < 4)
        {
            FireShot();
        }
    }

    RotationZVelocity = 0;

    if (XVelocity > 0)
        XAcceleration = -2;

    if (XVelocity < 0)
        XAcceleration = 2;

    if (YVelocity > 0)
        YAcceleration = -2;

    if (YVelocity < 0)
        YAcceleration = 2;

    if (InputManager.Keyboard.KeyDown(Keys.Left))
        ShipRotateLeft();

    if (InputManager.Keyboard.KeyDown(Keys.Right))
        ShipRotateRight();

    if (InputManager.Keyboard.KeyDown(Keys.Up))
        ShipThrust();
}

private void ShipRotateLeft()
{
    // RotationZVelocity is a field that exists in the PositionedObject
    // class.  Since Ship inherits from PositionedObject, this field can be
    // set.
    RotationZVelocity = 2;
}

private void ShipRotateRight()
{
    RotationZVelocity = -2;
}

private void ShipThrust()
{
    // increase to make the ship accelerate faster
    if (XVelocity < 200 && YVelocity < 200 && XVelocity > -200 && YVelocity > -200)
        Acceleration = RotationMatrix.Right * 50;
}

private void FireShot()
{
    AxisAlignedRectangle newBullet = ShapeManager.AddAxisAlignedRectangle();
    newBullet.ScaleX = 2;
    newBullet.ScaleY = 2;
    float secondsToLast = 0.65f;
    MethodInfo methodInfo = typeof(ShapeManager).GetMethod("Remove", new Type[] { typeof(AxisAlignedRectangle) });
    MethodInfo spritemethodInfo = typeof(SpriteManager).GetMethod("RemoveSprite", new Type[] { typeof(Sprite) });
    // This will remove the bullet after 0.65 seconds
    newBullet.Instructions.Add(new StaticMethodInstruction(methodInfo, new object[] { newBullet }, TimeManager.CurrentTime + secondsToLast));
    // This makes it so the bullet spawns at the nose of the ship.
    newBullet.Position = this.Position + this.RotationMatrix.Right * 11;
    // This sets the bullet speed.
    newBullet.Velocity = this.RotationMatrix.Right * 650 + (Velocity / 4);
    mBullets.Add(newBullet);
} |
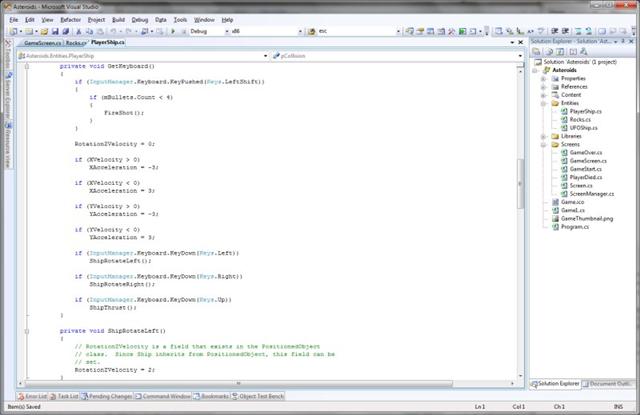
Now here we have al lot of things going on. First in the GetKeyboard method we look to see if the Right Shift has been pressed, if it has it the FireShot method runs where we make a new Rectangle (Read here for help on Rectangles) set its scale to 2, with our 1 to 1 setting, and because the center is 0, it makes a 4 pixel wide and high rectangle. Next we have how long we want the bullet to last before it removes itself. We put that information inside instructions. (Read here for help with Instructions) You can insert statements into FRB objects, part of the engine. Really useful for bullets. Here we tell it to remove itself after 65 tenths and five hundredths of a second. That is what I timed it on the original game at. Next we want the bullet to come out of the nose, not the center of the ship, so we use the rotationmatrix method (read about math functions used in objects here) built into positioned objects. Comes in handy, right. Now, to get the speed right we figure in one forth of the ship velocity into the bullet velocity, and again we use that handy rotationmatrix to have it fire in the right direction. For 2D where 0 is to the right its always Right. Now we add that bullet we put all that data into, into the list. Boom there it is!
Then we look for ship movement, first we have to see if the ship is already moving, and spinning. If so stop the spinning, or slow the ship. In the original game the ship slows down slowly. Now we see if you are pressing left or right if you are then it sets the rotation of the ship. Next is the thrust, now here we see just how fast you are going, and if you are not going too fast, then we let you do more. Remember this is a 0 centered game engine. So moving to the left is negative movement, and so is going up. So we must check both ways. Nothing too complected, this is just a tutor after all.
Now add this private method:
private void WrapPlayerObjects()
{
    foreach (PositionedObject Shot in mBullets)
    {
        // Check each side and wrap if necessary
        if (Shot.X > SpriteManager.Camera.RelativeXEdgeAt(0))
            Shot.X = -SpriteManager.Camera.RelativeXEdgeAt(0);

        if (Shot.X < -SpriteManager.Camera.RelativeXEdgeAt(0))
            Shot.X = SpriteManager.Camera.RelativeXEdgeAt(0);

        if (Shot.Y > SpriteManager.Camera.RelativeYEdgeAt(0))
            Shot.Y = -SpriteManager.Camera.RelativeYEdgeAt(0);

        if (Shot.Y < -SpriteManager.Camera.RelativeYEdgeAt(0))
            Shot.Y = SpriteManager.Camera.RelativeYEdgeAt(0);
    }

    if (X > SpriteManager.Camera.RelativeXEdgeAt(0) && XVelocity > 0)
        X = -SpriteManager.Camera.RelativeXEdgeAt(0);

    if (X < -SpriteManager.Camera.RelativeXEdgeAt(0) && XVelocity < 0)
        X = SpriteManager.Camera.RelativeXEdgeAt(0);

    if (Y > SpriteManager.Camera.RelativeYEdgeAt(0) && YVelocity > 0)
        Y = -SpriteManager.Camera.RelativeYEdgeAt(0);

    if (Y < -SpriteManager.Camera.RelativeYEdgeAt(0) && YVelocity < 0)
        Y = SpriteManager.Camera.RelativeYEdgeAt(0);
} |
Here we make sure the bullets and the ship have not gone off the edge without warping to the other side. Just like the rocks. Notice the ship one differs slightly, because it can stop, we don't want it flickering back and forth.
Add these lines into the Activity public method:
Add these lines into the Activity public method:
GetKeyboard(); WrapPlayerObjects(); |
Here we run those two new methods with each frame of the game.
Add these lines to the Destroy public method:
Add these lines to the Destroy public method:
while (mBullets.Count != 0)
mBullets.Last.RemoveSelfFromListsBelongingTo(); |
Here we clean up after ourselves, so if there are any bullets around when its destroyed, they are removed.
Step Four
Open the GameScreen.cs class file, we will finish up here.
In the Activity public class add the line:
In the Activity public class add the line:
PlayerSprite.Activity(); |
This runs the activity method in the PlayerShip instance of the class known as PlayerSprite.
Add this in the Private Methods region:
Add this in the Private Methods region:
// Our first private method for the screen class. We need to go in reverse
// because if one is removed, they are shifted up. These are lists.
private void PlayerShotvsRocks()
{
    for (int Bullet = PlayerSprite.Bullets.Count - 1; Bullet > -1; Bullet--)
    {
        for (int Rock = RockSprites.Collisions.Count - 1; Rock > -1; Rock--)
        {
            if (PlayerSprite.Bullets[Bullet].CollideAgainst(RockSprites.Collisions[Rock]))
            {
                RockSprites.AsteroidHit(Rock);
                break;
            }
        }
    }
} |
This method as you can see is two for loops that go through the lists for Rocks and Bullets, using the built in CollideAgainst function of the game engine we can easily check to see if they collide. As you can see that public function we made earlier goes into effect. We have to break out of the for loop because of the change in count of rocks. You can remove that if you wanna see what happens if you don't. Maybe nothing, depends on what Rock it was on when it got hit.
Add this other line to Activity public class:
Add this other line to Activity public class:
PlayerShotvsRocks(); |
I told you that would be fun, this is the most you have added at one time so far. There is allot of stuff working together here. Now run the project when you hit play, you should be able to move your ship around and fire bullets. Notice the ship slowly slows down just like in the original. Your bullets kind of follow your movement as well as hit rocks making them vanish! See how easy that was! I did my best to copy the original game so far. In the next chapter we add collision detection, then you can hit the rocks!
If you are having any issues you can always download the project so far Asteroids Chapter 3.
