Introduction to the Pixel Shader
by Agustin Rosso
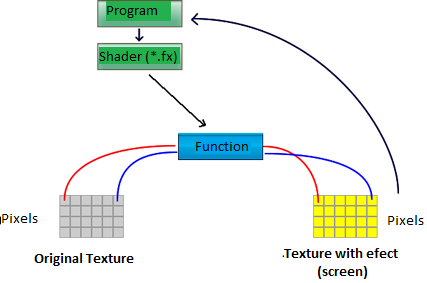
On this ocasion, I'm going to explain you the basic concepts to code our own 2D Shaders. As I mentionned earlier in the article of introduction to the Shaders (HLSL: Introduction to the Shaders), those are directly executed by the video card, taking the work of the processor.
So you get an idea of how it works, the pixel shader works directly on the pixels of the image, having the color data of each pixel: R(red), G(green), B(blue), A(Alpha).
So you get an idea of how it works, the pixel shader works directly on the pixels of the image, having the color data of each pixel: R(red), G(green), B(blue), A(Alpha).
Basically, the structure of a shader is the following:
sampler TextureSampler;
float4 GrayScal(float2 tex2D : TEXCOORD) : COLOR
{
    float4 Color = tex2D(TextureSampler, texCoord.xy);
    return Color;
}
technique Technique1
{
    pass Pass1
    {
        PixelShader = compile ps_2_0 GrayScal();
    }
} |
This particular example doesn't have any effect, that is why we'll use it as a base.
Technique
First, there is the technique, which, in this case, we called "Technique1".
Pass
Inside the "technique", we have the passes this technique will go through, a technique may have many passes that must be called specifically in the project.
Inside the "Pass", we have the method or function that will execute our shader, in this case "GRayScal", which is compiled with the compilation version "ps_2_0", the compilation version you can use depends on the video card you use.
For now, you can use ps_3_0 and ps_4_0 which have the more instructions.
Data Types
sampler: It is a variable type that we use to save information about the texture, in this case "TextureSampler".
float: It is a numerical value of a floating point.
float2: The difference with float is that it has 2 values, that can be used to save information about coordinates, for example float2(0.01, 0.05).
float3: The same way float2 has 2 values, this variable has 3 values, for example float3(0.5, 1, 0.03).
float4: As th others, this variable saves 4 values, it is the data type used to save information about the color.
Working with float values
There are two ways of obtaining the values of a float: with xyzw or rgba properties. For example:
float4 _ejem1 = float4(1, 0, 0.1, 0.5); float _ejem2 = _ejem.x; // _ejem2 = 1 float _ejem2 = _ejem.z; // _ejem2 = 0.1 float _ejem2 = _ejem.r; // _ejem2 = 1 float _ejem2 = _ejem.a; // _ejem2 = 0.5 float _ejem3 = _ejem.xy; // _ejem3 = (1, 0) float _ejem3 = _ejem.yz; // _ejem3 = (0, 0.1) float _ejem3 = _ejem.rg; // _ejem3 = (1, 0) |
To obtain those values, you can use both ways, but never together:
float2 _ejem4 = _ejem.xg // _ejem4 = Error |
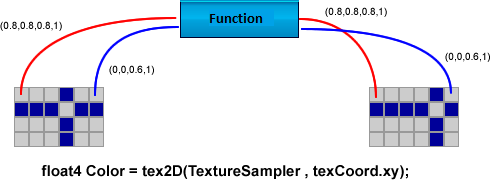
Functions
All the functions working with a pixel shader must return a color and must receive texture coordinates as input parameter.
float4 GrayScal(float2 texCoord :TEXCOORD) :COLOR
{
   float4 Color = tex2D(TextureSampler, texCoord.xy);
   return Color;
} |
In this case, we have a function returning a float4 which is a color (COLOR) and we have a float2 that gives us the texture coordinates (TEXCOORD). This function will be executed for each pixel from the texture.
In this functin, we could realize an operation that would modify the values of the color (RGBA).
In it, we can use different instructions for example "tex2D", this particular instruction receives the texture (TextureSampler) and the texture coordinates (texCoord.xy) as parameters, it will give us the color of this pixel inside the texture, that's why this shader doesn't have any effect.
As you can see in the graphics, the RGB values vary from 0 to 1, being the highest value.
For example:
For example:
float4(1, 0, 0, 1) // Red float4(0, 1, 0, 1); // Green float4(0, 0, 1, 1); // Blue |
The value of "a" is the alpha channel (transparency) of the pixel, unless you want it to be transparent this value is normally 1.
Introduction to the syntax
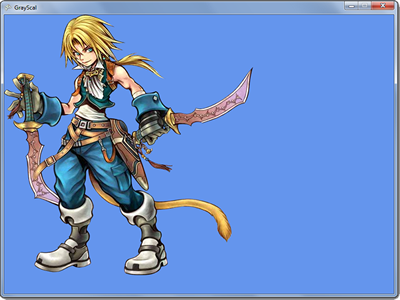
This is an example of the shader I used, as everybody knows any texture is a rectangle, in this case, this texture has pixels with an alpha channel equal to 0 so we see it that way.
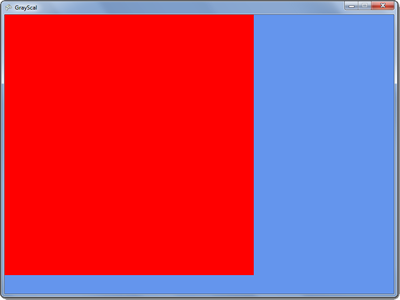
float4 GrayScal(float2 texCoord : TEXCOORD) : COLOR
{
   float4 Color = float4(1, 0, 0, 1);
   return Color;
} |
As you can see in this example, I changed the instruction that gave me the pixel color changing it directly into red.
float4 GrayScal(float2 texCoord :TEXCOORD) :COLOR
{
   float4 Color = float4(1*texCoord.x, 0, 0, 1);
   return Color;
} |
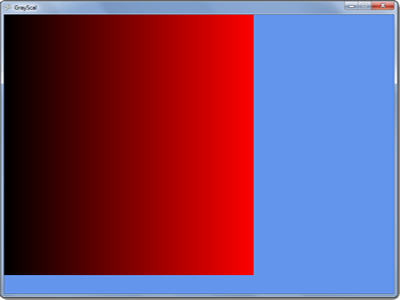
In this particular case, we use the x position of the pixel to calculate the red tone that the texture will have.
The coordinates are not, as we are used to, in relation with the position of the screen, in this case the position of the pixels vary between 0, the left border of the texture, and 1, its right border, therefore the color of the texture vary from (0, 0, 0, 1) black to (1, 0, 0, 1) red.
It works exactly the same with the y coordinate.
float4 GrayScal(float2 texCoord :TEXCOORD) :COLOR
{
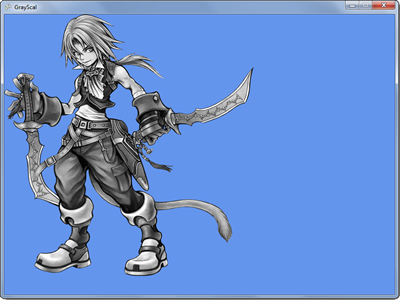
float4 Color = tex2D(TextureSampler, texCoord.xy);
Color.rgb = (Color.r + Color.g + Color.b)/3;
return Color;
} |
Coming back to the original example, we averaged the RGB values to obtain a gray scales of each pixel.
Those are the most basic effects, in case you want to add complexity, you can use other types of instructions.
Those are the most basic effects, in case you want to add complexity, you can use other types of instructions.
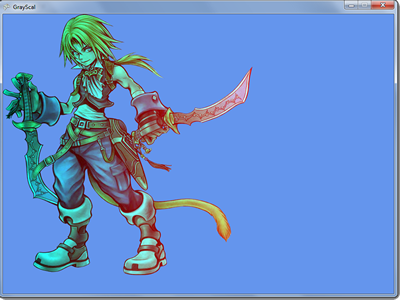
float4 GrayScal(float2 texCoord : TEXCOORD) : COLOR
{
   float4 Color = tex2D(TextureSampler, texCoord.xy);
   Color.r = sin(texCoord.x);
   return Color;
} |
This type of instructions are more complex to use but allows to make of a great variety of effects.
For more information about instructions, read: http://msdn.microsoft.com/en-us/library/ms810449.aspx#shaderx2_introductionto_topic4
For more information about instructions, read: http://msdn.microsoft.com/en-us/library/ms810449.aspx#shaderx2_introductionto_topic4
float4 GrayScal(float2 texCoord : TEXCOORD0): COLOR
{
     float4 Color = tex2D(TextureSampler , texCoord.xy);
     if(Color.a == 0)
          Color = float4(0,0,1,1);
     return Color;
} |
In this example we'll use the test "if", as you can si because it suits the condition "if it is transparent" draw the pixel in blue.
Finally we have the use of external variables, these are variables that receive values from the game.
Finally we have the use of external variables, these are variables that receive values from the game.
float Intensity;

float4 GrayScal(float2 texCoord : TEXCOORD0) : COLOR
{
     float4 Color = tex2D(TextureSampler , texCoord.xy
     float _grayColor = (Color.r + Color.g + Color.b)/3;
     Color.r += (_grayColor - Color.r) * Intensity;
     Color.g += (_grayColor - Color.g) * Intensity;
     Color.b += (_grayColor - Color.b) * Intensity;
     return Color;
} |
