Post Process Noise/Distortion
You are reading the XNA 3.1 version of this tutorial.
This tutorial builds on Tutorial 9, post process wiggling. If you haven't read that yet, you should in order to fully understand what's going on here.
The source-code and binaries can be found in the end of the tutorial.
The source-code and binaries can be found in the end of the tutorial.
Noise/Distortion
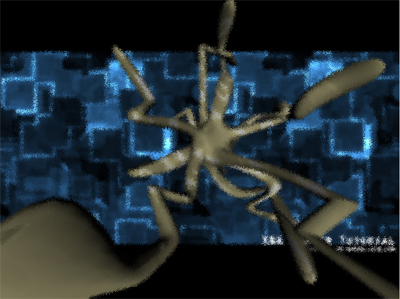
In this tutorial, we are going to add some Noise/Distortion to our scene.
To add some noise/distortion to your scenes, we must add a distortion value to out texture coordinates, and when modified, we must use the new texture coordinate to look up into a texture sampler.
We also want to animate the noise, so we would need a timer that will affect the distortion amount, and we must have a value that indicates how much we want to distort our image, and a seed that will be used in the distortion algorithm.
Implementing the shader
Now, let's implement this little shader!
First of all, we need to declare some global variables in our shader:
First of all, we need to declare some global variables in our shader:
// This will use the texture bound to the object( like from the sprite batch ). sampler ColorMapSampler : register(s0); // A timer to animate our shader float fTimer; // the amount of distortion float fNoiseAmount; // just a random starting number int iSeed; |
ColorMapSampler is our rendered scene, fTimer is our timer, fNoiseAmount is a value that indicates how much the scene will be distorted. A value between 0.001 to 0.5 is pretty good, and lastly, our seed value that will be used when calculating the noise.
Next, we need to add some logic to our pixel shader. First of all, we need to calculate our noise factor:
Next, we need to add some logic to our pixel shader. First of all, we need to calculate our noise factor:
float NoiseX = iSeed * fTimer * sin(Tex.x * Tex.y+fTimer); NoiseX=fmod(NoiseX,8) * fmod(NoiseX,4); |
This is just a "random" math formula that takes our seed, timer and the texture coordinates to make the random value different between our pixels. Feel free to play with this in order to archive differnt effects.
We are also using a new function here: fmod(x,y).
This function returns the floating-point reminder of x divided by y.
Next, we need to calculate how much the distortion will affect each x and y component. We want these to be slightly different to make it look a little randomized:
We are also using a new function here: fmod(x,y).
This function returns the floating-point reminder of x divided by y.
Next, we need to calculate how much the distortion will affect each x and y component. We want these to be slightly different to make it look a little randomized:
float DistortX = fmod(NoiseX,fNoiseAmount); float DistortY = fmod(NoiseX,fNoiseAmount+0.002); |
Now, we got what we need to create our new texture coordinates:
float2 DistortTex = float2(DistortX,DistortY); |
And, lastly, use the new distort texture coordinate with the old texture coordinate to end up with a slightly distorted texture coordinate:
float4 Color=tex2D(ColorMapSampler, Tex+DistortTex); |
This is our post process shader:
// Global variables
// This will use the texture bound to the object( like from the sprite batch ).
sampler ColorMapSampler : register(s0);

// A timer to animate our shader
float fTimer;

// the amount of distortion
float fNoiseAmount;

// just a random starting number
int iSeed;

// Noise
float4 PixelShaderGo(float2 Tex: TEXCOORD0) : COLOR
{
    // Distortion factor
    float NoiseX = iSeed * fTimer * sin(Tex.x * Tex.y+fTimer);
    NoiseX=fmod(NoiseX,8) * fmod(NoiseX,4);

    // Use our distortion factor to compute how much it will affect each
    // texture coordinate
    float DistortX = fmod(NoiseX,fNoiseAmount);
    float DistortY = fmod(NoiseX,fNoiseAmount+0.002);

    // Create our new texture coordinate based on our distortion factor
    float2 DistortTex = float2(DistortX,DistortY);

    // Use our new texture coordinate to look-up a pixel in ColorMapSampler.
    float4 Color=tex2D(ColorMapSampler, Tex+DistortTex);

    // Keep our alphachannel at 1.
    Color.a = 1.0f;

    return Color;
}

technique PostProcess
{
    pass P0
    {
        // A post process shader only needs a pixel shader.
        PixelShader = compile ps_2_0 PixelShaderGo();
    }
} |
NOTE:
You might have noticed that I have not used effect.commitChanges(); in this code. If you are rendering many objects using this shader, you should add this code in the pass.Begin() part so the changed will get affected in the current pass, and not in the next pass. This should be done if you set any shader parameters inside the pass.
You might have noticed that I have not used effect.commitChanges(); in this code. If you are rendering many objects using this shader, you should add this code in the pass.Begin() part so the changed will get affected in the current pass, and not in the next pass. This should be done if you set any shader parameters inside the pass.
