Alpha Mapping
You are reading the XNA 3.1 version of this tutorial.
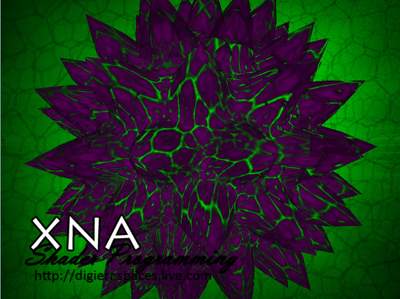
Welcome to another tutorial in the XNA Shader Programming series. Today we are going to look at a simple, but important shader: The Alpha map!
The Alpha map is very useful when you want to render a 3D object where some parts are transparent and other parts are solid. This could be a window with some cracks on it, making the cracks solid and the rest transparent! There are many other places you can use alpha maps, like thin/thick ice, skin, flowers, insect wings, and wherever you want to mix solid and transparent part!
Executable + Source can be downloaded from the end of the tutorial
Alpha Mapping
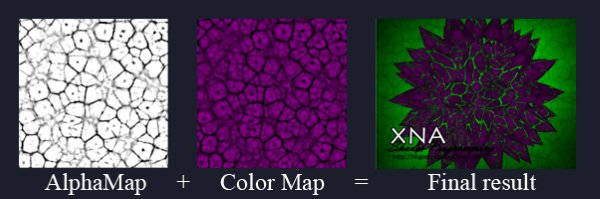
The general idea is to introduce an other texture we can use in our shaders, the alpha map. This texture will be a grayscale texture, where the black parts means the object is fully transparent, a shade of gray means its a mid thing of transparent and solid, and white means it will be 100% solid.
You can think of the grayscale texture as a texture that contains how solid an object is, stored as a grayscale color that represents a percent. A color of 0.0( Black ) means its 0% solid. A color of 0.5( gray ) means its 50% solid, and 1.0( white ) means its 100% solid.
So our shader can contain two textures: the ColorMap that represents the objects color, and a AlphaMap that represents the objects opacity.
Implementing the shader
In this tutorial, I'm just using the Diffuse Shader, and making that shader support Alpha Mapping. This could be any shader you want so feel free to implement this in your own shaders!
First of all, the shaders need two textures:
First of all, the shaders need two textures:
- Color Map
- Alpha Map
texture ColorMap;
sampler ColorMapSampler = sampler_state
{
Texture = |
Now we got our textures. Then we need to set the alpha channel of the color we return to the value stored in the Alpha map. This is done in the Pixel Shader:
Color = (Ai*Ac*Color)+(Color*Di*Dd); Color.a = tex2D(AlphaMapSampler, Tex).r; return Color; |
Here we calculate the diffuse color as we usually do, and put it in color.
After this, we go in to the Colors .a component, that is the Colors alpha channel, and set it to the value stored in the alpha map. All color-channels in the alpha map are the same( because its a grayscale texture ), so it does not matter if you use the r,g or b channel. I'm just using the .r channel in this example.
Our technique for todays lesson looks like this:
technique DiffuseShader
{
   pass P0
   {
      AlphaBlendEnable = True;
      SrcBlend = SrcAlpha;
      DestBlend = InvSrcAlpha;

      Sampler[0] = (ColorMapSampler);
      Sampler[1] = (AlphaMapSampler);

      VertexShader = compile vs_2_0 VertexShader();
      PixelShader = compile ps_2_0 PixelShader();
   }
} |
As you can see, we set AlphaBlendEnable to true, and use det SrcAlpha/InvSrcAlpha as the blending function. This means that we use the alphachannel to make things transparent.
Using the shader
Nothing new on how to use the shader. We just got to remember to pass the color and alpha textures to the shader.
I have also added an overlay texture named m_Overlay. This is used to render the overlay in front of the whole screen, using the alpha values found in a .PNG file. These alpha values can be set by using Photoshop or many other picture editor programs.
I have also added an overlay texture named m_Overlay. This is used to render the overlay in front of the whole screen, using the alpha values found in a .PNG file. These alpha values can be set by using Photoshop or many other picture editor programs.
spriteBatch.Begin(SpriteBlendMode.AlphaBlend, SpriteSortMode.Immediate, SaveStateMode.SaveState);
{
   spriteBatch.Draw(m_Overlay, new Rectangle(0, 0, 800, 600), Color.White);
}
spriteBatch.End(); |
NOTE:
You might have noticed that I have not used effect.commitChanges(); in this code. If you are rendering many objects using this shader, you should add this code in the pass.Begin() part so the changed will get affected in the current pass, and not in the next pass. This should be done if you set any shader parameters inside the pass.
You might have noticed that I have not used effect.commitChanges(); in this code. If you are rendering many objects using this shader, you should add this code in the pass.Begin() part so the changed will get affected in the current pass, and not in the next pass. This should be done if you set any shader parameters inside the pass.
