Windows Phone: Moving Sprites

Welcome back to the Windows Phone 7 Development tutorial!
Today we are going to move the sprite we created in tutorial 2 by changing the spritePosition vector. I also resized the sprite to 64x64 to make it a bit bigger. :)
What we will do is to change the spritePosition.X variable so our character moves from one side of the screen to the other. Once it reaches the left/right side of the screen, it will change the direction and move to the other side of the screen.
This tutorial will only focus on the Update function of our game, and a new function we will create named MoveCharacter.
All the code that will move our character will happen inside the MoveCharacter function. In order to make this run based on time( so our character won't move faster on a device/computer that is faster than another device/computer), we will pass the gameTime timer from Update to the MoveCharacter function.
We start by adding the global variable spriteDirection to our global variables as an integer value of 1, and then creating the MoveCharacter function, add this function to our game class:
int spriteDirection = 1;
protected void MoveCharacter(GameTime gameTime)
{
spritePosition.X += (float)gameTime.ElapsedGameTime.Milliseconds / 10.0f * spriteDirection;
if (spritePosition.X >= 400.0f)
spriteDirection *= -1;
if (spritePosition.X <= 50.0f)
spriteDirection *= -1;
}
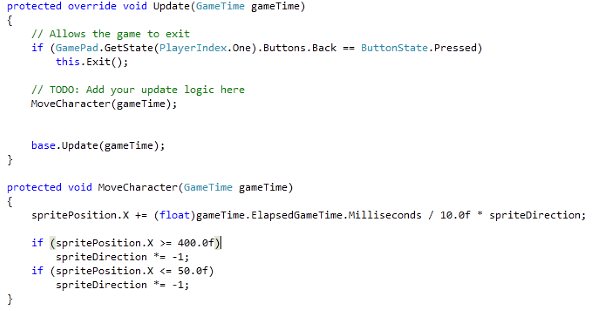
This functions takes the gameTime variable, and adds the elapsed game time in milliseconds * spriteDirection to the X direction of our spritePosition. spriteDirection used to change the direction the character moves. If the characters is on the right side, we multiply the direction with -1, making the value spritePosition.X is added with, negative. This will make it move to the left side of the screen instead. If the character is on the left side of the screen, we multiply the negative value by -1 again, making it positive.
This will make the character move back and forth between X=50 and X=400.
Next, we will have to call the MoveCharacter(..) function we just created from the games Update() loop.
MoveCharacter(gameTime);
The code should look something like this:
All the code that will move our character will happen inside the MoveCharacter function. In order to make this run based on time( so our character won't move faster on a device/computer that is faster than another device/computer), we will pass the gameTime timer from Update to the MoveCharacter function.
We start by adding the global variable spriteDirection to our global variables as an integer value of 1, and then creating the MoveCharacter function, add this function to our game class:
int spriteDirection = 1;
protected void MoveCharacter(GameTime gameTime)
{
spritePosition.X += (float)gameTime.ElapsedGameTime.Milliseconds / 10.0f * spriteDirection;
if (spritePosition.X >= 400.0f)
spriteDirection *= -1;
if (spritePosition.X <= 50.0f)
spriteDirection *= -1;
}
This functions takes the gameTime variable, and adds the elapsed game time in milliseconds * spriteDirection to the X direction of our spritePosition. spriteDirection used to change the direction the character moves. If the characters is on the right side, we multiply the direction with -1, making the value spritePosition.X is added with, negative. This will make it move to the left side of the screen instead. If the character is on the left side of the screen, we multiply the negative value by -1 again, making it positive.
This will make the character move back and forth between X=50 and X=400.
Next, we will have to call the MoveCharacter(..) function we just created from the games Update() loop.
MoveCharacter(gameTime);
The code should look something like this:
Now, hit F5 to build, compile and deploy your game to the emulator and see it all in action!
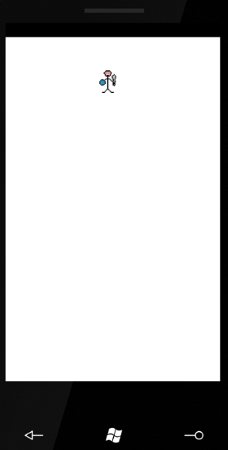
And that ends this tutorial. It was very simple, but it sure creates some movements to our game!
