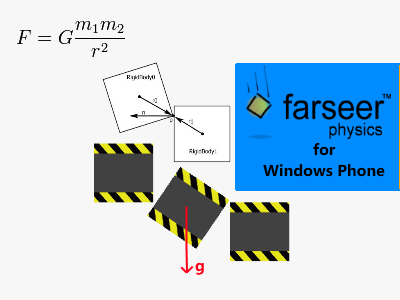
Farseer Physics in XNA 4.0 for Windows Phone
In this tutorial series, we will go though some of the basics with
Farseer Physics Engine 3.3.1 to implement physics into you 2D games.
To get started, go to http://farseerphysics.codeplex.com/ and download Farseer Physics Engine 3.3.1 to your computer.
With the download comes the library itself + many cool samples you can learn from.
Getting started
Start by creating a new project in Visual Studio and create a XNA 4.0 Windows Phone Game. When the new project is created, add a reference to the FarseerPhysicsXNA library (the dll is in the folder of Farseer Engine).

Also, add these using statements:
using FarseerPhysics.Dynamics;
using FarseerPhysics.Factories;
Now we are ready to start implementing physics into our game!
To do this, we must create a Farseer World object that will contain our world of physics.
It’s simply done using the World class from the Farseer library:
To do this, we must create a Farseer World object that will contain our world of physics.
It’s simply done using the World class from the Farseer library:
World world;
Now, in LoadContent, we will run the constructor for the World object, giving it a gravity of 1, meaning that the objects will get a pull of 1 in the Y-axis.
if (world == null)
{
    world = new World(new Vector2(0, 1));
}
else
{
    world.Clear();
}
Now, having the world instance set up, we need to update it in the mainloop.
We do this by simply running the Step-function of the World object, making the world of physics do one step ahead.
We do this by simply running the Step-function of the World object, making the world of physics do one step ahead.
world.Step(Math.Min((float)gameTime.ElapsedGameTime.TotalSeconds, (1f / 30f)));
Adding static and dynamic rectangle
To add a box to our world that will stay still (not being pulled by gravity or affected by dynamic(moving) object, we add a Body object. We need three boxes in this example, one dynamic and two static.
To add a box to our world that will stay still (not being pulled by gravity or affected by dynamic(moving) object, we add a Body object. We need three boxes in this example, one dynamic and two static.
Body rectangle;
Body rectangle2;
Body rectangle3;
And then in LoadContent, we say that the Body should be a rectangle, static and it’s position.
rectangle2 = BodyFactory.CreateRectangle(world, 1f, 1f, 1.0f);
rectangle2.BodyType = BodyType.Static;
rectangle2.Position = new Vector2(2.7f, 2);

rectangle3 = BodyFactory.CreateRectangle(world, 1f, 1f, 1.0f);
rectangle3.BodyType = BodyType.Static;
rectangle3.Position = new Vector2(5.0f, 3);
Now we have two static rectangles in our world. Let’s also add a new object that’s a rectangle and dynamic, meaning it will be affected by gravity and static objects,
rectangle = BodyFactory.CreateRectangle(world, 1f, 1f, 1.0f);
rectangle.BodyType = BodyType.Dynamic;
rectangle.Position = new Vector2(3.5f, 0);
Rendering
We render using a sprite batch in the Draw loop.
What we do is to render a texture at each of the rectangles positions, rotate it and set it’s origin to the middle.
We render using a sprite batch in the Draw loop.
What we do is to render a texture at each of the rectangles positions, rotate it and set it’s origin to the middle.
spriteBatch.Begin();
spriteBatch.Draw(rectangleSprite,
                 ConvertUnits.ToDisplayUnits(rectangle.Position),
                 null,
                 Color.White,
                 rectangle.Rotation,
                 new Vector2(rectangleSprite.Width / 2.0f,
                             rectangleSprite.Height / 2.0f),
                 1f,
                 SpriteEffects.None,
                 0f);
spriteBatch.Draw(rectangleSprite,
                 ConvertUnits.ToDisplayUnits(rectangle2.Position),
                 null,
                 Color.White,
                 rectangle2.Rotation,
                 new Vector2(rectangleSprite.Width / 2.0f,
                             rectangleSprite.Height / 2.0f),
                 1f,
                 SpriteEffects.None,
                 0f);
spriteBatch.Draw(rectangleSprite,
                 ConvertUnits.ToDisplayUnits(rectangle3.Position),
                 null,
                 Color.White,
                 rectangle3.Rotation,
                 new Vector2(rectangleSprite.Width / 2.0f,
                             rectangleSprite.Height / 2.0f),
                 1f,
                 SpriteEffects.None,
                 0f);
spriteBatch.End();
As you can see, from both the earlier section and the draw-loop is that the world object uses its own coordinate system and not the normal pixel-coordinate system.
private static float _displayUnitsToSimUnitsRatio = 100f;
public static Vector2 ToDisplayUnits(Vector2 simUnits)
{
    return simUnits * _displayUnitsToSimUnitsRatio;
}
This function simply converts the physics simulator units to pixel units. We can see that we have chosen each unit in the simulator to be 100 pixels. That means that the resolution in the simulator world goes from 0 to 8 in the X-axis and 0 to 4,8 in the Y-axis.
Applying force
It’s also possible to apply force using normal conditions. In this example, I added a force that will make the objects bounce.
Applying force
It’s also possible to apply force using normal conditions. In this example, I added a force that will make the objects bounce.
if (rectangle.Position.Y > 3)
{
    rectangle.ApplyForce(new Vector2(0, -20));
}
If the object goes over 3 in the simulator world, or 300 in the phones pixel coordinate system, it will apply a force on the rectangle, pushing it upwards.