Asteroids with FRB
part 5
Alright, I think it is time to add the UFO. What about the rocks you say, they are supposed to break into smaller rocks you say. How about we do that in the next chapter. I think is very useful to know how easy it is to have an entity that is controlled by 'AI' to shoot at something. What we will do is have a random chance that it shoots in a random direction, or at the player. That chance gets higher to shoot the player as the game goes on. Just like the original. We will have two sizes of UFO later, for now we start with just one. I'm going to go a bit faster now, hoping you have learned something from the earlier chapters. We are going to use the stuff we learned and apply it here, and as a bonus maybe even learn more.
I've added more comments into the code as I went over it all again. You may want to download the Chapter Five version to look it all over at the end of the page if you are having any issues in following the code and why I do what I did. If you have any questions feel free to contact me.
This may be the most difficult chapter to date, so please read carefully. I will do my best to be as clear as I can.
Step One
Open the UFOShip.cs class file, we will start there.
Add this after the class name:
Add this after the class name:
: PositionedObject |
It should look like this:

We only have one UFO on the screen at a time, so we may as well make the class a PositionedObject. This way we can easily access the variables that pertain to the UFO as an object. This inherits the PositionedObject class, making it part of our new class. Later we will be adding two types of UFO, the large, and small ones.
Step Two
Add this to the Fields region:
private AxisAlignedRectangle rCollision; float fDirectionTimer; // This is how often it changes directions: float fDirectionRate = 3; float fSpawnTimer; // This is how often the UFO spawns: float fSpawnRate = 20; // This is how fast the UFO goes: int iSpeed = 20; |
No here we have added allot of variables, this would be the most we have done at once. I figure if you have made it this far, you should be able to keep up.
First we initialize the Collision, a rectangle for the UFO. Later we will be going further into derived classes, and moving all and any repeated code to a derived class, one part at a time so as to not lose anyone. The next part is for how often the UFO will change direction. You will see it is the 0 to Rate + Rate / 2. That is Zero to 3 with half the rate again added. That way Half the Rate is the smallest amount of time, and the Rate with half again added as the maximum amount of time. A random number generator is used to pick a time between that. You will see that later. The Spawn Timer works the same as the Direction Timer. For now we are going to just set its speed.
First we initialize the Collision, a rectangle for the UFO. Later we will be going further into derived classes, and moving all and any repeated code to a derived class, one part at a time so as to not lose anyone. The next part is for how often the UFO will change direction. You will see it is the 0 to Rate + Rate / 2. That is Zero to 3 with half the rate again added. That way Half the Rate is the smallest amount of time, and the Rate with half again added as the maximum amount of time. A random number generator is used to pick a time between that. You will see that later. The Spawn Timer works the same as the Direction Timer. For now we are going to just set its speed.
Step Three
Add this to the properties region:
public AxisAlignedRectangle Collision
{
    get { return rCollision; }
} |
This is the property so that we can access the Collision rectangle, so it can be shot by the player, as well as run into a rock or the player. Notice the property only has a get statement, that makes it read only.
Step Four
Add this to the Private Methods region:
private void CreateCollision()
{
    rCollision = ShapeManager.AddAxisAlignedRectangle();
    rCollision.ScaleX = 20;
    rCollision.ScaleY = 10;
    rCollision.AttachTo(this, false);
    rCollision.Visible = false;
} |
This creates the rectangle by adding it to the FRB ShapeManager, we then add the width, or ScaleX, and hight, or ScaleY. The next part is why we have this class as an Positioned Object. Now we attach the Collision to the class, the 'this' refers to the class that is a positioned object because we had it inherit that earlier. Now we make it invisible. We are going to use the collision visibility to tell weather the UFO is on or not, for now.
Step Five
Add this to the Private Methods region:
private void Spawn()
{
    StartCorner();
    rCollision.Visible = true;
    SetDirectionTimer();
}

private void SetSpawnTimer()
{
    fSpawnTimer = (float)TimeManager.CurrentTime + (float)(FlatRedBallServices.Random.NextDouble() * fSpawnRate + fSpawnRate / 2);
}

private void SetDirectionTimer()
{
    fDirectionTimer = (float)TimeManager.CurrentTime + (float)(FlatRedBallServices.Random.NextDouble() * fDirectionRate + fDirectionRate / 2);
} |
In this function though small does allot. It calls the StartCorner() function you will see below, that positions the X and Y so that it is in one of four corners and going the correct direction. then turns the collision to a visible state. After that it sets the timer that is used for when it next changes direction using the Function we add next.Then we make functions for setting the Spawn and Direction Timers. Sense they are set in more then one place, we should have functions for them.
Step Six
Add this to the Private Methods region:
// Let's figure out what corner we want it in:
private void StartCorner()
{
    NewYCourse();
    int Corner = (int)(FlatRedBallServices.Random.NextDouble() * 4);
    switch (Corner)
    {
        case 0: StartTopLeft();
            break;
        case 1: StartTopRight();
            break;
        case 2: StartBottomLeft();
            break;
        case 3: StartBottomRight();
            break;
    }
}

// The function name says it all:
private void StartTopLeft()
{
    X = -SpriteManager.Camera.RelativeXEdgeAt(0) - rCollision.ScaleX;
    Y = (float)(SpriteManager.Camera.RelativeYEdgeAt(0) + FlatRedBallServices.Random.NextDouble() * 100 - 150);
    XVelocity = (float)(FlatRedBallServices.Random.NextDouble() * iSpeed + iSpeed);
    RotationY = 0;
}

private void StartTopRight()
{
    X = SpriteManager.Camera.RelativeXEdgeAt(0) + rCollision.ScaleX;
    Y = (float)(SpriteManager.Camera.RelativeYEdgeAt(0) + FlatRedBallServices.Random.NextDouble() * 100 - 150);
    XVelocity = (float)(FlatRedBallServices.Random.NextDouble() * iSpeed - iSpeed * 2);
    RotationY = (float)Math.PI;
}

private void StartBottomLeft()
{
    X = -SpriteManager.Camera.RelativeXEdgeAt(0) - rCollision.ScaleX;
    Y = (float)(-SpriteManager.Camera.RelativeYEdgeAt(0) + FlatRedBallServices.Random.NextDouble() * 100 + 50);
    XVelocity = (float)(FlatRedBallServices.Random.NextDouble() * iSpeed + iSpeed);
    RotationY = 0;
}

private void StartBottomRight()
{
    X = SpriteManager.Camera.RelativeXEdgeAt(0) + rCollision.ScaleX;
    Y = (float)(-SpriteManager.Camera.RelativeYEdgeAt(0) + FlatRedBallServices.Random.NextDouble() * 100 + 50);
    XVelocity = (float)(FlatRedBallServices.Random.NextDouble() * iSpeed - iSpeed * 2);
    RotationY = (float)Math.PI;
} |
Now that was pretty long, a group of five functions that work together to decide what corner the UFO will spawn in. As you can see, there is some repeated code here, we will fix that up later. For now let us get this working so we can see it go. As you can see a random number is generated so that one of our choices is made. A case statement must have the break command used or it will just keep on going down the list. Now in the four functions that we set the X on the left or right edge, then the Y near the top or bottom. Next we set the X Velocity in the correct direction as well as set the Rotation Y depending on what way it is going. This will be used later to make the shot appear in front of the UFO depending on what direction it is going as well as rotate the sprite, so that it flips to point the right way.
Step Seven
Add this to the Private Methods region:
private void WrapHight()
{
    if (Y > SpriteManager.Camera.RelativeYEdgeAt(0))
        Y = -SpriteManager.Camera.RelativeYEdgeAt(0);

    if (Y < -SpriteManager.Camera.RelativeYEdgeAt(0))
        Y = SpriteManager.Camera.RelativeYEdgeAt(0);
}

private void GoneOffEdge()
{
    if (X < -SpriteManager.Camera.RelativeXEdgeAt(0) - rCollision.ScaleX ||
        X > SpriteManager.Camera.RelativeXEdgeAt(0) + rCollision.ScaleX)
    {
        Deactivate();
    }
}

private void NewYCourse()
{
    YVelocity = (float)(FlatRedBallServices.Random.NextDouble() * iSpeed * 2 - iSpeed);
}

private void Deactivate()
{
    rCollision.Visible = false;
    SetSpawnTimer();
} |
These are all pretty simple functions, so I'll just group them together. We only wrap the top and bottom movement of the UFO, so the first function WrapHight() will do that. It is called in the Activity function below as is the GoneOffEdge() function. The NewYCourse() function is called by the Direction Timer in the Activity function below. The Deactivate() function is called if it goes off the Edge by the GoneOffEdge() function. That sets the Spawn Timer for when it will spawn again using the function we added earlier. We will use the Deactivate() function again later, for when the player hits the UFO, so it needs its own function.
Step Eight
Add this to the Constructor region:
public UFOShip()
{
    SpriteManager.AddPositionedObject(this);
    CreateCollision();
    SetSpawnTimer();
} |
Now here we have a special function that is automatically called when this class is instanced. Here we add the class to the Sprite Manager. Next we call the CreateCollision() function we added earlier, then last we set the Spawn Timer using that function we added earlier. This makes the class all ready to go for us.
Step Nine
Add this to the Public Methods region:
public void Activity()
{
    if (rCollision.Visible)
    {
        if (TimeManager.CurrentTime > fDirectionTimer)
        {
            SetDirectionTimer();
            NewYCourse();
        }
        WrapHight();
        GoneOffEdge();
    }
    else
    {
        if (TimeManager.CurrentTime > fSpawnTimer)
        {
            Spawn();
        }
    }
} |
Here we have a fairly long Activity function that is called by the GameScreen class that we have yet to add it to. It checks to see if the Direction Timer has run out, and if so call that function. Next it calls two functions to make sure it gets wrapped from top to bottom or bottom to top, and if it runs off the right or left edge, calling those functions on each frame that the Collision is visible. If the Collision is not visible then the Spawn Timer is checked to see if it runs out.
Step Ten
Add this to the Public Methods region:
public void Destroy()
{
    SpriteManager.RemovePositionedObject(this);
    ShapeManager.Remove(rCollision);
}

public void Hit()
{
    Deactivate();
} |
The last functions we add to the class in this chapter are the rest of the public functions. Here we get ready for the UFO to get hit, and when we switch screens we need to destroy all the objects we create. This is the other place I talked about before where we will also need to call the Deactivate() function from the Game screen class.
This is just the beginning.
Now we go to the GameScreen.cs file, open it for editing please.
This is just the beginning.
Now we go to the GameScreen.cs file, open it for editing please.
Step Eleven
Add this to the Fields region:
private UFOShip UFOSprite; |
Add this to the Public Methods region in the Initialize Method:
// We are going to use the Default manager here. // We really only need to use the default manager for our game. UFOSprite = new UFOShip(); |
Add this to the Public Methods region in the Activity Method:
UFOSprite.Activity(); |
Add this to the Public Methods region in the Destroy Method:
UFOSprite.Destroy(); |
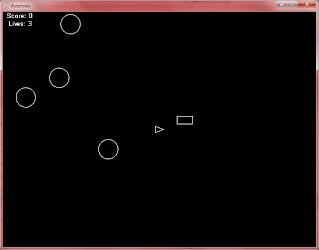
That is that. Alright, run it, it should work. You should see a square appear in a corner after 20 seconds, give or take. In the next chapter we add collision detection, and make it so the UFO can fire at the player! Oh these are exciting times!
If you have any issues, as always you can download the project so far.
If you have any issues, as always you can download the project so far.
