Sun Shader
Albedo Map
We start with the creation of the sun's ordinary texture map. Check out this YouTube-Link to learn how you can do this with only a few Photoshop clicks! After this your map should look like this:
Obviously, the sun's underlying mesh is a simple sphere that comes along with predefined (u,v) texture-coordinates. But we don't want that! Instead, we want a more "natural" representation of the spherical domain, that is: A cube map! I used HDRShop to transform from plane to the a cubic representation. To do so, you do Image->Panorama->Panoramic Transformation and then Image A: Latitude/Longitude and Image B: Image Cross. Note that this creates some ugly polar convergences :-(

Unfortunately, HDRShop cannot convert the cube cross to the cube-fileformat (DDS), so we have to use another tool, that is AMD's CubeMapGen. Here, you can load the cube cross (as image file) and then save it as cube file (dds format). You can also specify the image format, I used A16B16G16R16 and calculated all mipmap-levels with the DirectX Texture Viewer.

Finally, we have created the cube map, load it to the TextureCube Format of XNA and access the right texel in our shader with "color = texCUBE( sampler, Normal.xyz )".
Turbulences / Heat
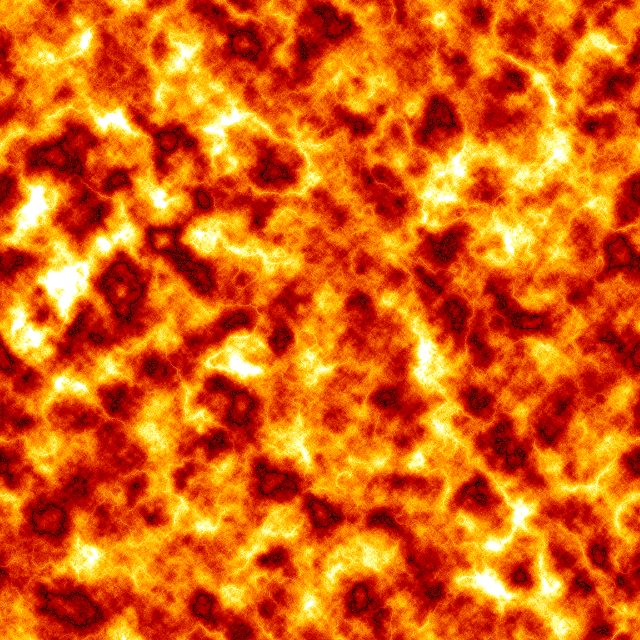
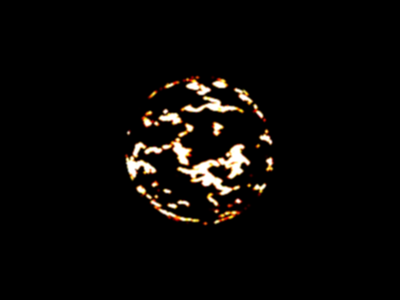
This is the tricky part. The simulation of the sun's turbulences and heat does not have to be physically correct, it only has to look nice. For this purpose, I created two different (this is important!) versions of the lower figure. I again used Photoshop to do this. I started with difference clouds, adjusted color levels then and inverted the result. Just play a little bit, other patterns might look even cooler than mine.
What you do then is exactly the same as done with the albedo map, you convert these images to cube maps. Now it's time to cheat: We render the sphere again, but now two times with different rotations axes and different rotation speeds. I used additive blending to add the color values. I then wrote a shader that only passes pixels with a brightness greater than 1.0 to the screen, i.e. some kind of binary "and" operation applied to pixels.
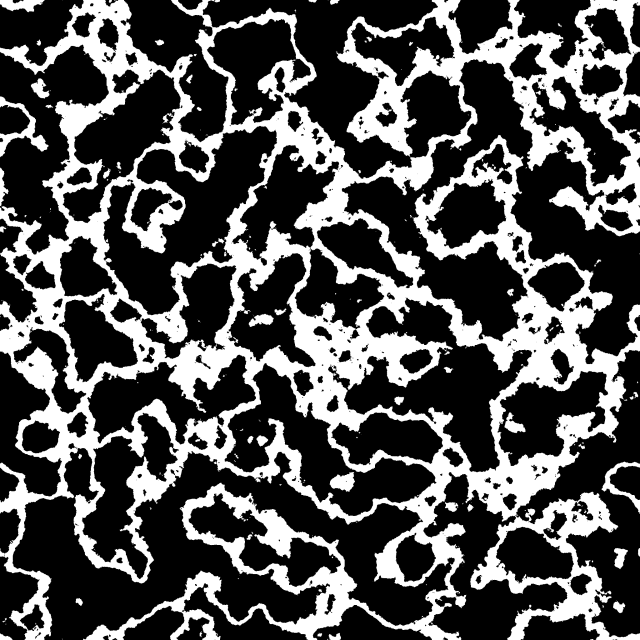
If you add two ordinary low dynamic range textures, your maximum value is 2.0. Because we selected pixel values greater than one, every visible pixel lies now in the range [0,1]. It's time to cheat a second time, because we use this luminance value to address a texture that stores the final color value! This texture looks like this and was again (booorrring) created with Photoshop:
If you add two ordinary low dynamic range textures, your maximum value is 2.0. Because we selected pixel values greater than one, every visible pixel lies now in the range [0,1]. It's time to cheat a second time, because we use this luminance value to address a texture that stores the final color value! This texture looks like this and was again (booorrring) created with Photoshop:

Pixels with a luminance value of near 1 remain white and therefore very hot. As the pixel's luminance decreases, it first becomes yellow, that red and finally black. Note that I scaled this texture to the height of 10 pixels for visualization. The result should look like this:
High Performance Blur
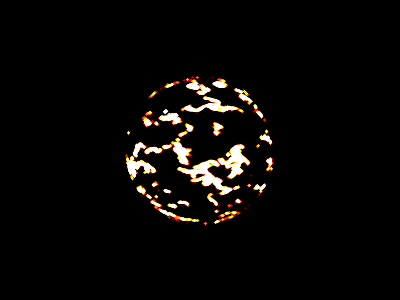
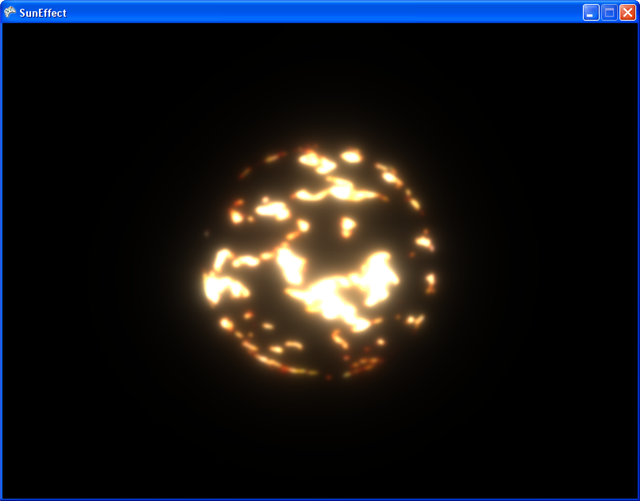
Much has been written about real-time blur, so I will only briefly describe how it is done. If you take the above image and scale it down five times, you will get something like this, some kind of mipmap-chain:
|

|


A remark has to be made here: Keep in mind that we use 64 bit render targets all the time, i.e. every pixel's red, green and blue-component is stored in 16 bit precision. If you want to downscale a 64 bit render target, your NVIDIA card driver might help you to create smooth, filtered results without jaggies. Not so do ATI cards! For 128 bit render targets, you don't get filtered results from neither of those manufacturers.
So at this time, it's easier to just write your own linear filter that is applied to each pixel. In my pixel shader, Ii just take the left/right upper/lower neighboring pixel and create the average. This shader was applied to the images you see above. As you can see, the image in the lowest resolution looks very appealing and not jaggy.
What you do next is to apply a blur to every of these five images. I started with a 7x7 gaussian filter only to notice that there is absolutely no visible difference to a 3x3 gaussian!
|

|


Note how subtle the effect of the small filter kernel is, you barely see a difference to the upper chain! So how do we get a powerful blur-effect from this? Well, the next thing took me days of desperate thinking and hopeful debugging: If you want to combine these blurred images to one single image, this is the right path to go:
- scale 16x16 to 32x32, blend it with the blurred 32x32 image and store it to a temporary 32x32
- scale the temporary 32x32 to 64x64, blend it with the blurred 64x64 and store it to a temporary 64x64
- scale the temporary 64x64 to 128x128, blend it...
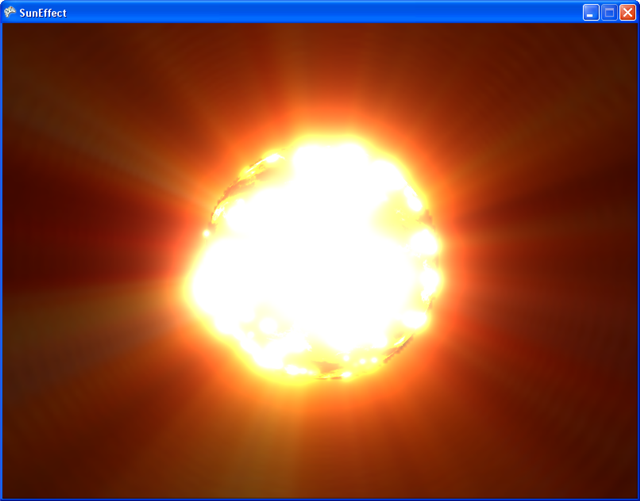
Blending the results
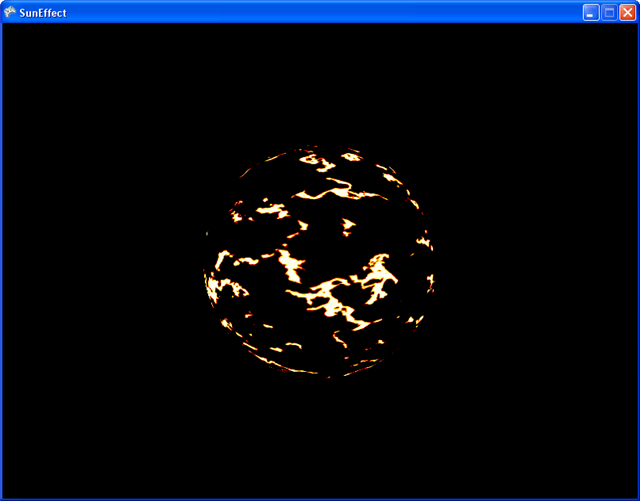
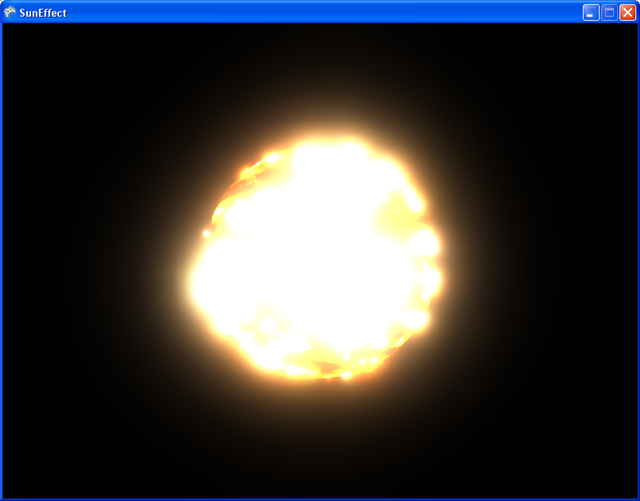
We're almost done! At this point, we have one render target containing the ordinary textures sphere and the blurred, high dynamic range turbulence render target. Using additive alpha blending, combining these two targets gives you something like this.
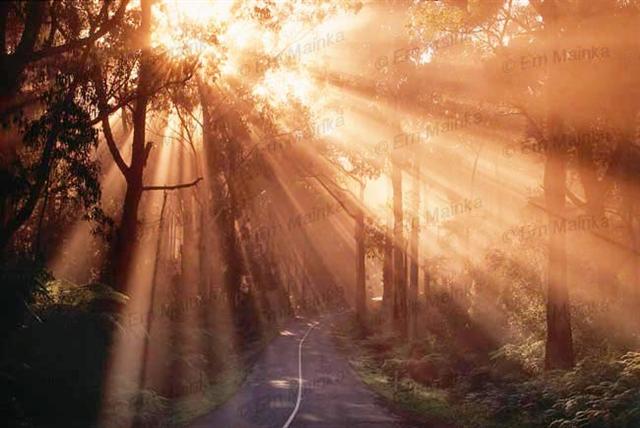
Addition: Crepuscular Rays
Crepu...whatty? Crepuscular Rays or "God Rays" occur when photons are absorbed by particles such as dust or water (steam?). If you enter one of these terms into google, you get nice real-life pictures like this:
God Rays are done really easily. A nice description of how it is done is given in the latest edition of GPU Gems III, Chapter 13 by Kenny Mitchell. The basic idea is: You first create a masked render target of all opaque objects of your scene. For every pixel that is not masked, you compute the direction from that pixel (texture space) to the 2D position of a light source. Along that direction, you take samples in regulary steps. The more samples you take, the better the quality. Now we blend it to the already created render target!
PS: This was written in less than one hour. Please leave me a message for corrections and/or questions. The source code is available as well.
